Filigree or filigree?
Essentially, these two words mean the same thing.
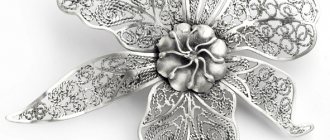
Only the first - originally Russian - means “twist”, “twist threads”. The second is of European origin, more precisely Latin, and is based on the words “thread” and “grain”. So filigree is a certain way of making patterned products from thin wire, which is drawn from precious metals (silver, platinum, gold). The result is, simply put, wire lace.
To decorate such products, so-called grains - small balls - are often used. They are also made of precious metals - silver, gold.
Kabarovsky is one of the most creative jewelry brands in Russia
Kabarovsky's philosophy is based on combining the traditions of jewelry art with current fashion trends. Over the centuries, Russian jewelry art has given the world great masters, whose traditions are still preserved and passed on from generation to generation. This is what allows Kabarovsky to be who they are - followers of jewelry masters. The concept of the brand’s jewelry is based on the traditions of the houses of Faberge, Rückert and Khlebnikov: attention to the smallest details, unusual images, long-forgotten techniques for working with precious metals and at the same time modern design, current trends and innovative technologies allow them to be produced as real works of art , as well as popular seasonal collections, and proudly bear the status of one of the most creative brands of modern jewelry in Russia.
Origin of filigree
Surprisingly, it, having originated in ancient times, continues to be used in modern times in almost the same form. It is wrong to think that filigree (filigree) first appeared in Ancient Rus'. This is wrong. Monuments of the 6th-4th centuries BC. BC, belonging to Greece and Egypt, prove a high level of mastery of this type of jewelry technology. However, the drawing method for producing wire was not known in ancient times. It was made from a metal rod by forging and polishing. In Rus', drawn filigree became widespread in the 10th century. Around the same time, grain began to be used in filigree items. And only in the 15-16th centuries very different materials were used: enamel, precious stones, wood.
LiveInternetLiveInternet
Quote from Martina25
Read in full In your quotation book or community!
Filigree (from Old Russian skat - to twist), filigree is a type of jewelry technique: an openwork or soldered pattern on a metal background made of thin gold, silver or copper wire, smooth or twisted into ropes.
Filigree products are often complemented with grain (small silver or gold balls) and enamel. Filigree is one of the traditional types of artistic metal processing. This technique, which originated in ancient times, has remained almost unchanged to this day. A flagellum twisted from two or more silver, gold or copper wires is called filigree, or filigree. The smooth wire is pulled through a series of holes in a steel plate held in a vice or on a drawing machine. The wire passed through the rollers becomes flat, in the form of a ribbon. The preliminary drawing is made on paper, the outline of the future pattern is laid out and glued onto it. Then the parts collected in this way are sprinkled with solder (a crushed alloy of silver or gold with non-ferrous metals) and, under the influence of fire, are soldered into an openwork pattern. Depending on the design, the openwork pattern can be soldered onto metal or take on a relief shape. The filigree is supplemented with grain - small metal balls, which introduce plastic play and enrich the product. This technique gives endlessly varied variations in the combination of filigree with grain, the construction of floral and geometric patterns, and combinations with smooth metal and stones. History In Kievan Rus, the filigree technique began to be used from the 9th-10th centuries. At that time, twisted wire was not yet used for production, but grains were used. Products of the 12th-13th centuries are of high quality; at that time, brazed technology began to be used more often, and from the 13th century - openwork and relief filigree; stones began to be used in production. The 15th and 16th centuries saw the heyday of Moscow filigree. A variety of materials were used: precious stones, enamel, wood, carved bone. The most famous scanners at that time were Ambrose and Ivan Fomin. In the 18th and 19th centuries, filigree items were produced in many art centers in Russia. Both large works of art and small items (vases, salt shakers, boxes) were created. Crystal and mother-of-pearl began to be used in production. Since the 19th century, industrial production has been established on a significant scale using various technologies. The factories produced dishes, church utensils, and toiletries. During the years of Soviet power, filigree was widely used in the art industry (products of the Krasnoselsky jewelry factory in the Kostroma region, the Mstera art factory "Jeweler" (since 1937) in the Vladimir region, the Yerevan jewelry factory and many others). Along with jewelry, household items were made: openwork filigree vases, glass holders, miniature sculpture, etc. Source: https://finifty.ru Photo from the site: https://www.fotorussian.ru https://images.yandex.ru The fruit bowl is made of iron wire. All parts are soldered together with a soldering iron.
Pendant in the shape of a samovar.
Here I combined two technologies.
Night light.
https://stranamasterov.ru/node/186967
Master class on making filigree from the Sorceress ( marusic
) For everyone who thinks that this is very difficult: labor-intensive - yes, time-consuming - yes. But it's not difficult! I think many people are simply unaware of all the possibilities of plastic, and this is what stops them)
First, a little about the style itself. “The word filigree comes from the Latin filum - thread and granum - grain. Laconic and simple, it indicates the constituent elements of technology. The Russian name for filigree - filigree - reflects a technical technique, a process. Skan - from the Old Russian “skat” - “to twist”, “twist” threads.
The filigree technique is based on the formation of decor using smooth, ribbed or twisted wires made of metal (copper, silver, gold). Both round and flattened wires are used. The combination of wires of different cross-sections, the ornament created using repeating or alternating elements, sets a rhythmic pattern. The grain serves for emphasis, there is no additional means of designating “filigree”, there is no designation of what material, in fact, these threads and grains should be made of)))))) Therefore, no one will forbid us to make it from plastic and with every right to call it filigree) )) For example, here is one of my recent works made using this technique. https://pics.livejournal.com/marusic/pic/00099g6q https://pics.livejournal.com/marusic/pic/0009as7x https://pics.livejournal.com/marusic/pic/0009bgpk https://pics .livejournal.com/marusic/pic/0009ccw9 In general, no one obliges you to imitate metal))), the openwork is good in itself, but the shine still gives an additional effect of volume, so the master class will be on making “metallic” filigree.
Making the thing for this master class cost me an hour and a half (taking photographs and drinking tea doesn’t count)))) To make it, you will need this:
Plastic in two colors Gel (not necessarily Fimov’s) Cutting tool (scalpel, blade, etc.) Toothpicks Needle Metal powder First, about plastic. I rarely use plastic straight from the pack. I always mix it up. Fimo, scalpey, and cernit are used. The proportions depend on what consistency of plastic I need. I also prefer to mix colors myself. For filigree work, you need plastic that is quite soft, but not as soft as software) As for color: it all depends on what kind of metal you want to imitate. Metal powder is selected accordingly (it comes in silver, gold or bronze, and is sold in art stores and restoration departments). You can use plastic with or without a metallic effect. If you take up silver, I advise you not to take the “naked” color. Add a little gold to the metallic silver. Silver will not go away from this, but the shade will be more natural. This master class discusses imitation bronze. *Golden filigree is rarely patinated, simply because gold is not so easy to oxidize)), so I don’t really like it, there are a lot of patterns, but zero effect))))))* ———————— It’s better if For work, you will mix plastic that will be as close as possible to the color of the metal. This will add more naturalism. One color is for the base - dark, the other - for the pattern itself - light. If desired, you can mix metal powder into the light one, so it will shine more (the photo below shows the color of the plastic for comparison before and after mixing). But this is not necessary, since in the process most of the plastic will still be under a layer of powder. The material will not lose its plasticity, even if a fair amount of powder is mixed into it. Therefore, all the leftovers after work can be safely mixed and used again. By the way, about plasticity: These thin ropes can be rolled out of plastic, and this is not the limit))) But don’t be alarmed, you won’t need these). Because the human eye also has its limits, and the product should be visible without a magnifying glass))) But these ones will have to be rolled out even thicker: What, exactly, is the trick of filigree? And the fact is that most often it is not a round wire that is used, but a flattened one. Here is the same rope. But the flattened version looks much thinner than the blank. It is due to this profile that the effect of elegance is achieved. At the same time, the typed pattern itself - if you look from the side - will have a decent height. And that means strength) ————————— We prepare the ropes for the pattern:
To do this, you first just need to roll them out of plastic (the light one), and then roll them several times in metal powder. Strings lend themselves to the same techniques as sausages) That is. you can roll it thicker, and then stretch it carefully at the ends to get a very thin rope. Before working with the rope any further, roll it on a smooth, clean surface. This way you will achieve a real metallic shine. From these blanks you need to make the following: As a rule, a smooth flat profile is used for contours and rims, and a twisted rope (usually also flat) is used for internal patterns. But it all depends on your idea - you can not use a twisted rope at all, but limit yourself to only a smooth one (of different thicknesses). You can use another method to get a more blackened version. To do this, you need to take dark plastic, make some kind of element out of it, and then rub metal powder on the places that should shine. This can be done simply with your finger or a soft brush. This method is best suited for making large twisted flat rope (which is used in headbands). The most labor-intensive part of this process is making even pieces. Because any curvature immediately reveals the material. The metal wire after rolling is ideal along its entire length; there are no places where it would be thinner or thicker. Plastic is capricious and reacts to the slightest pressure. Therefore, when you twist and flatten the ropes, hold the element in your hands so that it simply does not fall out, i.e. without pressing on the plastic at all. Please note that nothing can be straightened by sanding later))) It is best if you flatten the ropes with glass (a transparent plastic ruler will also work). Transparency helps control thickness. After rolling in powder, the ropes do not stick to anything, so no problems will arise)) Even if the result of flattening does not please you, know that this is fixable. Just carefully pull out those places that have been flattened) ————————————- After the blanks for the patterns are ready, you can take them as a basis. It is made of dark plastic. The base can be in the form of a bead, convex or flat. In the last two cases, it is important that the thickness is uniform throughout. It is not advisable to make it thicker than 2 mm, because then it will be difficult with the rims) The rim adjacent directly to the base should be no less than a millimeter higher than it. A little more is better. Because the inner pattern should not rise above the rim (unless it is multi-layered filigree). And sometimes the pattern is located just below the rim. The rim itself can be single, or it can contain several turns of different ropes. In this case, I used a flat profile and a flat rope. But, before you attach the rim to the base (and this is the first thing you should do), you need to lightly burn the base. Literally 1-2 minutes. In general, I could write a whole ode of praise to stage-by-stage firing, because it is this that allows you to create real miracles with the material)) And the main secret of plastic filigree, or rather, its careful execution, lies precisely in stage-by-stage firing. While the base is baking, you prepare the “solder”))) To do this, mix the gel with the meth. powder. This mixture is necessary for filling joints. The parts themselves are attached to the base using a regular transparent gel. It must be applied in a thin layer to the side of the base, making sure that the rim does not warp, i.e. was perpendicular to the surface. This is followed again by a short firing. You can then attach additional strings to the rim if needed. They can be the same height or lower, smooth or twisted. Please note that the seams should not be visible. Next comes the operation of laying out the internal contour. This is something like a frame in which you will then create a pattern. Most often the contours are smooth. This creates a beautiful contrast with the internal twisted wire. It would be nice to have a preliminary sketch of what you are doing on hand))) It’s difficult with filigree without this. You can even lay out all the patterns on paper in advance, and then transfer them to a plastic base (at least, this is how it is done in jewelry technology))). If you are not confident in your eye and are afraid to miss, you can draw lines on the base with a pencil, which you then need to go over with gel (the tip of a toothpick is a wonderful tool for applying)))).
Next, the outline is laid out.
You can not smear the base with gel, but the part itself. True, this requires greater caution. Transferring small parts to the base is done like this: dip the tip of a toothpick into the gel and stick the part to it))) Sometimes it’s difficult to just place the part with your fingers)) After the outline is laid out, there’s another short firing. I repeat - 1-2 minutes, no more needed. Next begins the most painstaking work - laying out the pattern.
In this case, the gel must be applied not only to the base under the elements, but also where the parts come into contact with the contour. If you work without a sketch, then try to make symmetrical parts at the same time. Place them on the base at the same time. The adjustment of parts inside the contour is carried out using the same toothpick, but dry, without gel, and also using a needle if you want to move the tip of the element between other elements. When placing the part on the base, do NOT press it down with your finger! —————————— A little about the pattern: as you understand, it is made up of small, differently bent ropes. The elements are as follows: This is a classic. There are also a lot of others, more sophisticated, this is for those who get the hang of it))) They are still called by their own names, but I won’t fool you with that)))) ————————— If you want to use some kind of insert, it must be fired in advance. The pattern directly around the insert is done after the insert is attached to the base. The insert must be placed in the headband (on the gel). Then use the gel to attach it to the base. Remember about the seams. Next is another short firing. If you want to imitate jewelry knurling on the bezel, then you need to put a thin round rope (on the gel) on top of the bezel, as shown below in the photo on the right,
then use a needle to make notches. I used dark plastic, but you can immediately use one rolled in powder.
If you did this from a dark one, then you need to go over it with a brush with met. powder on the rim. Next, lay out the remaining pattern. After which you need to do the smallest work - make the grain)) To do this, you take a rope (thicker and thinner), rolled in powder, cut pieces of different sizes with a blade, and then roll them into balls. It's not difficult, but it takes a long time)
To make the balls shine well, you should dip your fingers a little into the powder) And then you place the balls on your product. For gel mixed with powder. As a rule, the balls are placed at the joints or where the tips of the elements are not very aesthetically pleasing)))) and generally where it is pleasing to the eye))
After this, the product goes into final firing. About 20 minutes. All holes - if there are any in the product, you need to plan them in the sketch and surround them with elements in the form of a ring. You can drill after firing, or you can drill at the very beginning, before baking the base. ——————————— Plastic “metallic” filigree is not varnished. This will immediately destroy the entire metallic effect. But inserts, if necessary, can even be done with a hand)))) For perfectionists)))): go over the finished filigree several times with a piece of thin suede. This will add extra shine. Result:
——————————— A small bonus for those who made it to the end))))))): if you need many identical elements in the form of a ring, there is a technique borrowed from jewelry practice)
Wind the rope onto something round that has a suitable diameter, let the plastic “cool”, and then use a blade to cut along the resulting spring. And you get a bunch of identical blanks for rings: ————————————————— And finally: in addition to dry powder, you can also use a mixture with wax-based metal powder. In this case, this paste is rubbed onto everything after firing, then into the oven for a couple of minutes. But it looks less like metal than with dry powder. By the way, you can roll any parts in metal powder) Acrylic cannot be compared with powder in terms of effect. The powder gives a completely smooth surface. If you thinly spread a gel mixed with a large amount of powder over a baked base, then after baking it will look like matte metal. Also read some posts on my website)))
Russian craft
Filigree in Ancient Rus' is a kind of calling card of original Russian jewelry art. This technique was widely used to make not only jewelry, but also church utensils, frames for sacred books and icons, weapons, and household items. For example, even morocco boots were decorated with filigree.
In the 17th century, special workshops were opened in Rus' in which they were engaged in the manufacture of wire (drawing). And at the monasteries, in the princely estates, workshops were opened in which real talents of filigree work worked. Chronicle sources name Ivan Fomin and Ambrose as the most famous masters of those times.
Filigree are very expensive products that were available only to rich people. After all, it was delicate manual work, requiring the master to have accumulated years of experience, which contained the secrets of mastery.
Periods of prosperity and decline
In the 18th and 19th centuries, filigree in Rus' experienced a period of prosperity. The range of products made using this jewelry technique is constantly expanding. Workshops appear in many cities, and soon factory production of scanned products is established.
The beginning of the 20th century, for obvious reasons, was a period of decline - war, revolution... Of course, there was no time for jewelry.
However, in Soviet Russia it is being revived again. And to such an extent that it gains worldwide fame. In 1937, at an exhibition in Paris, the products of craftsmen from the Krasnoselsky Handicraftsman artel received a gold medal, and they were also shown at an exhibition in New York (1939).
Products by craftsmen from the village of Kazachkovo (Nizhny Novgorod region), the village of Mstera (Vladimirov region), and the city of Privolzhsk (Ivanovo region) were also valued.
Over time, large factory production of filigree jewelry appeared in Moscow, Leningrad and other cities.
Jewelry art of Ancient Rus' - a legacy of generations
The jewelry art of Rus' impressed both the masters of ancient Europe and modern designers, who are increasingly borrowing ancient techniques and jewelry to create their own masterpieces.
Thus, temple rings and kolta, common in Rus', smoothly transformed into large earrings, and amulets and hryvnias came into fashion in the form of pendants, and all this together with the techniques of blackening, filigree and cloisonne enamel, which are used to this day.
Vintage techniques
The jewelry art of Ancient Rus' has amazed Europeans since ancient times, because work and decoration were influenced not only by Western technologies - the intersection with eastern merchants also played a decisive role in the development of Russian craftsmanship. True, in contrast to the exquisite geometric patterns that were most often used in the East, Russian designers mixed various techniques, producing products with an unusual flavor.
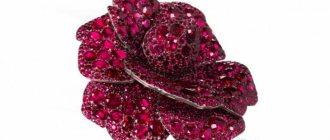
One of the most famous trends can be considered granulation, when thousands of small metal beads were fused onto one product, creating a magical play of light without the use of precious stones. At the same time, the basics of jewelry work were performed using casting: wax was used for more expensive and one-piece pieces, and stone molds were used for consumer products.
Thanks to the use of filigree, applied and openwork techniques, a light, dynamic relief ornament was created. In the modern world, this is called filigree, and recently bracelets using a similar technique have been in great demand (for example, in the 2010 season, such things can be found in Sabrina's Wide Ornate Diamond CZ Brace). In the 12th century, when the production of consumer goods increased, one of the most common works was engraving and blackening on silver, with only the background being made dark, while the picture itself remained light. This made it possible to create exquisite and sophisticated miniatures.
Jewelry exclusives of Ancient Rus'
Despite the fact that many works were lost during the Tatar-Mongol invasion, archaeologists managed to restore some truly unique jewelry. For example, kolta (paired hollow gold and silver pendants attached with chains or ribbons to the headdress), which were worn by city women in the 11th-13th centuries, can interest many fashionistas with their fine workmanship. Especially the Mikhailovsky gold kolta, decorated with freshwater pearls and images of fantastic birds with female heads using the cloisonné enamel technique.
No less famous is the “Chernigov hryvnia” (also known as the “Hryvnia of Vladimir Monomakh”), which was lost by the owner and later found by archaeologists. This 11th-century chased medallion depicts, on one side, a woman’s head in a ball of eight snakes with a prayer against disease in Greek, and on the other, the Archangel Michael, called upon to protect the owner of the hryvnia from the devil’s machinations. The finest workmanship of the medallion is so high that, according to the records of that time, it was estimated to be approximately the size of a princely tribute from an average city.
The rise of jewelry in the 18th century
It was in the 13th century in Russia that the term “jeweler” appeared instead of “gold and silversmith,” and thanks to new technologies and the active use of precious stones, the era of the flourishing of jewelry art began. At the beginning of the 19th century, Russian designers developed their own style of work, different from the European one, while almost every jeweler had his own characteristics. At that time, such well-known names as the firm of Ovchinnikov, the Grachev brothers, and Faberge appeared in our time.
Each had their own style, their own unique jewelry, which was valued both at the court of the Russian emperor and among the royal courts of other countries. At the same time, the jewelry art of even the most famous masters remained accessible to the Russian people. For example, Faberge Easter eggs, each of which is different from the others, were ordered by the Emperor for himself and his family, and at the same time, some of the works of this jeweler (relatively inexpensive cigarette cases) could be afforded by less wealthy people. Modern Russian designers have not lost their originality and uniqueness, which is why many Russian jewelry is still highly valued on the world market.
Bolotova Lelya
Types of jewelry filigree
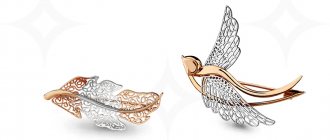
Depending on the method of making products, filigree can be of three types. In soldered filigree, a wire pattern is soldered onto a metal base.
In openwork filigree there is no base, wire patterns are fastened to each other, and metal lace is obtained. It is openwork filigree that is often called Russian filigree abroad.
The third type is volumetric filigree. As a rule, these are products consisting of several parts. So, these parts are also made separately using the filigree technique, and then combined into a single whole. These could be, for example, figurines of animals, a tray, a vase, a glass holder. Filigree gives these products sophistication and uniqueness.
Materials for filigree
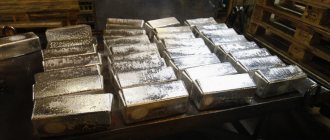
Since ancient times, it was believed that silver and gold were best suited for filigree. These noble, soft and impurity-free metals are easily drawn into wire. For example, a thread that can be made from 1 gram of gold will be about 2500 meters long.
However, scanned items made from precious metals are very expensive, so other materials have begun to be used to make them cheaper.
First of all, copper, because it has high ductility and softness. In addition, copper thread can be easily silvered or gilded.
Aluminum, cupronickel, brass and some other metals are also used. The main thing is to be able to pull a thin wire out of them. After all, filigree is a product consisting of wire patterns.
Forge or drag
You will be interested in: Morphogenetic fields of R. Sheldrake: description of the theory, features and interesting facts
Jewelry masterpieces created using the filigree technique existed before our era. The difference with the filigree of Ancient Rus' is determined by the method of producing wire from precious metals or alloys. They forged the wire or pulled the workpiece through a drawing device - the result was a thin jewelry thread. In Ancient Egypt and Greece, forging was used to make it.
Old Russian masters of the 10th century produced filigree silver and gold using the second method - drawing. What is filigree made many centuries ago is best seen in museums. They contain magnificent examples of princely household items and church utensils, decorated with fabulous ornaments. Clothes (boots, belts, etc.), book covers, dishes, crosses - filigree patterns bloomed everywhere. It is worth recalling that Monomakh’s hat is also decorated with filigree.
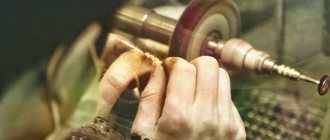
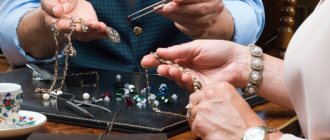
Scanning technique requires skill
Indeed, every master scanner has his own secrets of mastery. Even now, when factory production of such products has appeared, the share of manual labor remains large. And it depends on the master, on the skilled artist, how high-quality and beautiful the thing made using the filigree technique will be.
The thickness of the wire for various elements of the product, the amount and composition of solder, the duration of firing the wire... Every master has a lot of secrets. However, the main stages of work remain unchanged. You shouldn’t stop at the production of the wire threads themselves. Filigree is still the actual execution of a product, or even the creation of a work of art.
Having sorted the wire by thickness, the master twists it or leaves it smooth - it all depends on the product he is starting to work on. By the way, before starting it, he must make a full-size sketch of the product. Work is carried out on each detail separately. They bend strictly according to the sketch. For small ones, special tools such as tweezers are used, and large ones can be dealt with with your fingers. When making openwork patterns, the parts are first glued to the sketch and then soldered together. The paper on which the sketch is applied burns out when soldered, leaving only the product.
The soldered filigree is immediately attached to a metal base.
The final procedure is to silver plate the item and polish it.